DNA
DNA can be an important step in the identification process of missing persons. If your project chooses to use DNA analysis as part of your identification process then you have come to the right place. Here you will learn more about the DNA module in CoRA. A critical first step is to cut a sample of the specimen for DNA analysis and then assign a sample number to it for tracking purposes and after you get results from your DNA lab you can capture DNA information here to create a DNA Profile for further analysis.
Create a DNA Sample
The DNA sample and Profile are associated with a specimen, so you must first choose a specimen for which you want to create a DNA sample for. You can choose a specimen by navigating to the specimen screen from either the specimen search results screen or from any data table row that has a specimen link on it. All search and reports screens have specimen links on them. Simply click these links to navigate to the specimen view/edit screen. Once on the specimen screen you can navigate to the Specimen Action or Details, and then to the DNA Profile menu.
CoRA's intellisense will automatically take you to the Create DNA sample screen, if this is the first DNA sample you are trying to create for this specimen or will take you to the DNA list screen if a DNA Sample was previously created for this specimen. Note you can create multiple DNA samples for a specimen.
Tip
CoRA allows you to create multiple DNA samples for a specimen. If you have multiple dna samples, CoRA will create a Consensus DNA Profile for you with data from the multiple samples. Consensus DNA Profile is a powerful feature of CoRA.
The screen fields are shown below. Fields in bold are required.
| Attributes | Data Type | Size | Validation Rule | Required/Optional |
|---|---|---|---|---|
| Sample Number | Alphanumeric | 8 chars | can only contain letters and numbers | Required |
| Lab | Id | id | valid labs via dropdown setup for the org | Required |
| External Case Number | String | 32 chars | Optional |
Clicking Save will take you to the DNA Profile screen. You can visit the DNA Profile screen once you have received data from your DNA processing lab to enter DNA related data.
Edit DNA Profile
Specimens which have had a DNA sample successfully created will have an associated DNA Profile. The DNA profile contains all the relevant DNA attributes and are editable via action (user must have appropriate role and permissions).
You can visit the DNA Profile screen once you have received data from your DNA processing lab to enter DNA related data to build the DNA Profile for the specimen. On this screen click the pencil icon on the top right corner to edit the DNA profile.
The screen fields are shown below. Fields in bold are required.
| Attributes | Data Type | Size | Validation Rule | Required/Optional |
|---|---|---|---|---|
| Lab | Id | id | valid labs via dropdown setup for the org | Required |
| External Case Number | String | 32 chars | Optional | |
| BTB Request Date | Date | Optional | ||
| BTB Receive Date | Date | must be greater than BTB Request Date | Optional | |
| Disposition | String | 16 chars | valid disposition via dropdown | Optional |
| Sample Condition | String | 16 chars | valid sample condition via dropdown | Optional |
| Weight Sample Remaining | Decimal | Optional | ||
| Recommended for Resampling | Boolean | true/false toggle | Optional |
Click on Save if any of the fields were updated

Tip
The DNA profile has attributes to track Mito, Autosomal and Ystr components of the specimen DNA.
Mito
Click the pencil icon on the top right corner to update the DNA Mito information.
The screen fields are shown below. Fields in bold are required.
| Attributes | Data Type | Size | Validation Rule | Required/Optional |
|---|---|---|---|---|
| Method | Id | id | valid methods via dropdown setup for the org | Required |
| Request Date | Date | Optional | ||
| Receive Date | Date | must be greater than Request Date | Optional | |
| Results Status | String | 32 chars | valid results status via dropdown | Optional |
| Mito Sequence Number | String | 16 chars | Optional | |
| Mito Sequence Subgroup | String | 16 chars | Optional | |
| Mito Sequence Similar | String | 16 chars | Optional | |
| Base Pairs | String | 256 chars | Optional | |
| Count | Number | Optional | ||
| Population Frequency | Number | Optional | ||
| Confirmed Regions | String | 256 chars | Optional | |
| Mito Polymorphisms | String | 256 chars | Optional | |
| Mito Haplogroup | Id | id | valid haplogroups via dropdown setup for the org | Optional |
| MCC Date | Date | Optional |
Click on Save if any of the fields were updated
You will be able to see how many fields that were completed under Mito Form. You will see X/14 fields are filled.
Auto / AuStr
Click on the auto / austr Tab to update the autosomal DNA fields.
Click the pencil icon on the top right corner and then click on the auto/austr tab to update the autosomal DNA fields.
The screen fields are shown below. Fields in bold are required.
| Attributes | Data Type | Size | Validation Rule | Required/Optional |
|---|---|---|---|---|
| Method | Id | id | valid methods via dropdown setup for the org | Required |
| Request Date | Date | Optional | ||
| Receive Date | Date | must be greater than Request Date | Optional | |
| Results Status | String | 32 chars | valid results status via dropdown | Optional |
| Auto Sequence Number | String | 16 chars | Optional | |
| Auto Sequence Subgroup | String | 16 chars | Optional | |
| Auto Sequence Similar | String | 16 chars | Optional | |
| Number of Loci | String | 256 chars | Optional | |
| Loci | String | 256 chars | Optional | |
| MCC Date | Date | Optional |
Click on Save if any of the fields were updated
You will be able to see how many fields that were completed under auto / austr tab. You will see X/10 fields are filled.

Ystr
Click on the Ystr Tab to the update the Ystr DNA fields.
Click the pencil icon on the top right corner and then click on the Ystr tab to update the Ystr DNA fields.
The screen fields are shown below. Fields in bold are required.
| Attributes | Data Type | Size | Validation Rule | Required/Optional |
|---|---|---|---|---|
| Method | Id | id | valid methods via dropdown setup for the org | Required |
| Request Date | Date | Optional | ||
| Receive Date | Date | must be greater than Request Date | Optional | |
| Results Status | String | 32 chars | valid results status via dropdown | Optional |
| Ystr Sequence Number | String | 16 chars | Optional | |
| Ystr Sequence Subgroup | String | 16 chars | Optional | |
| Ystr Sequence Similar | String | 16 chars | Optional | |
| Number of Loci | String | 256 chars | Optional | |
| Loci | String | 256 chars | Optional | |
| Count | Number | Optional | ||
| Population Frequency | Number | Optional | ||
| Ystr Haplogroup | Id | id | valid haplogroups via dropdown setup for the org | Optional |
| MCC Date | Date | Optional |
Click on Save if any of the fields were updated
You will be able to see how many fields that were completed under auto / austr tab. You will see X/13 fields are filled.

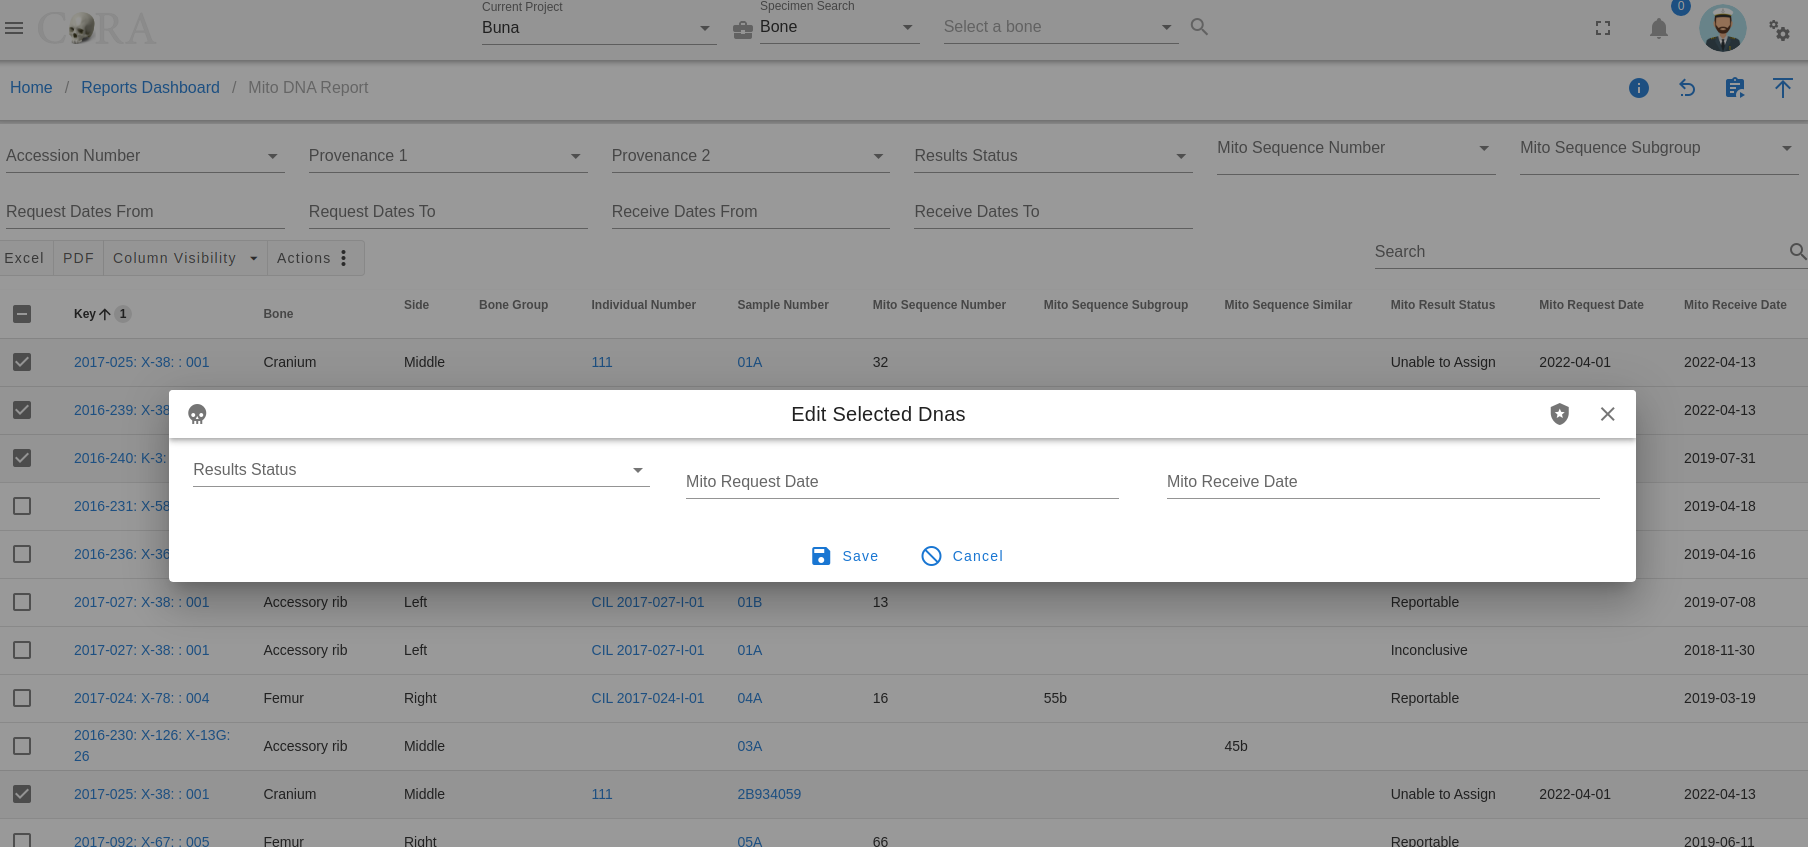
Batch Edit DNA
Select multiple DNA profiles by clicking on the boxes next to the ones you wish to edit, go to the Actions tab, and select Batch Edit.
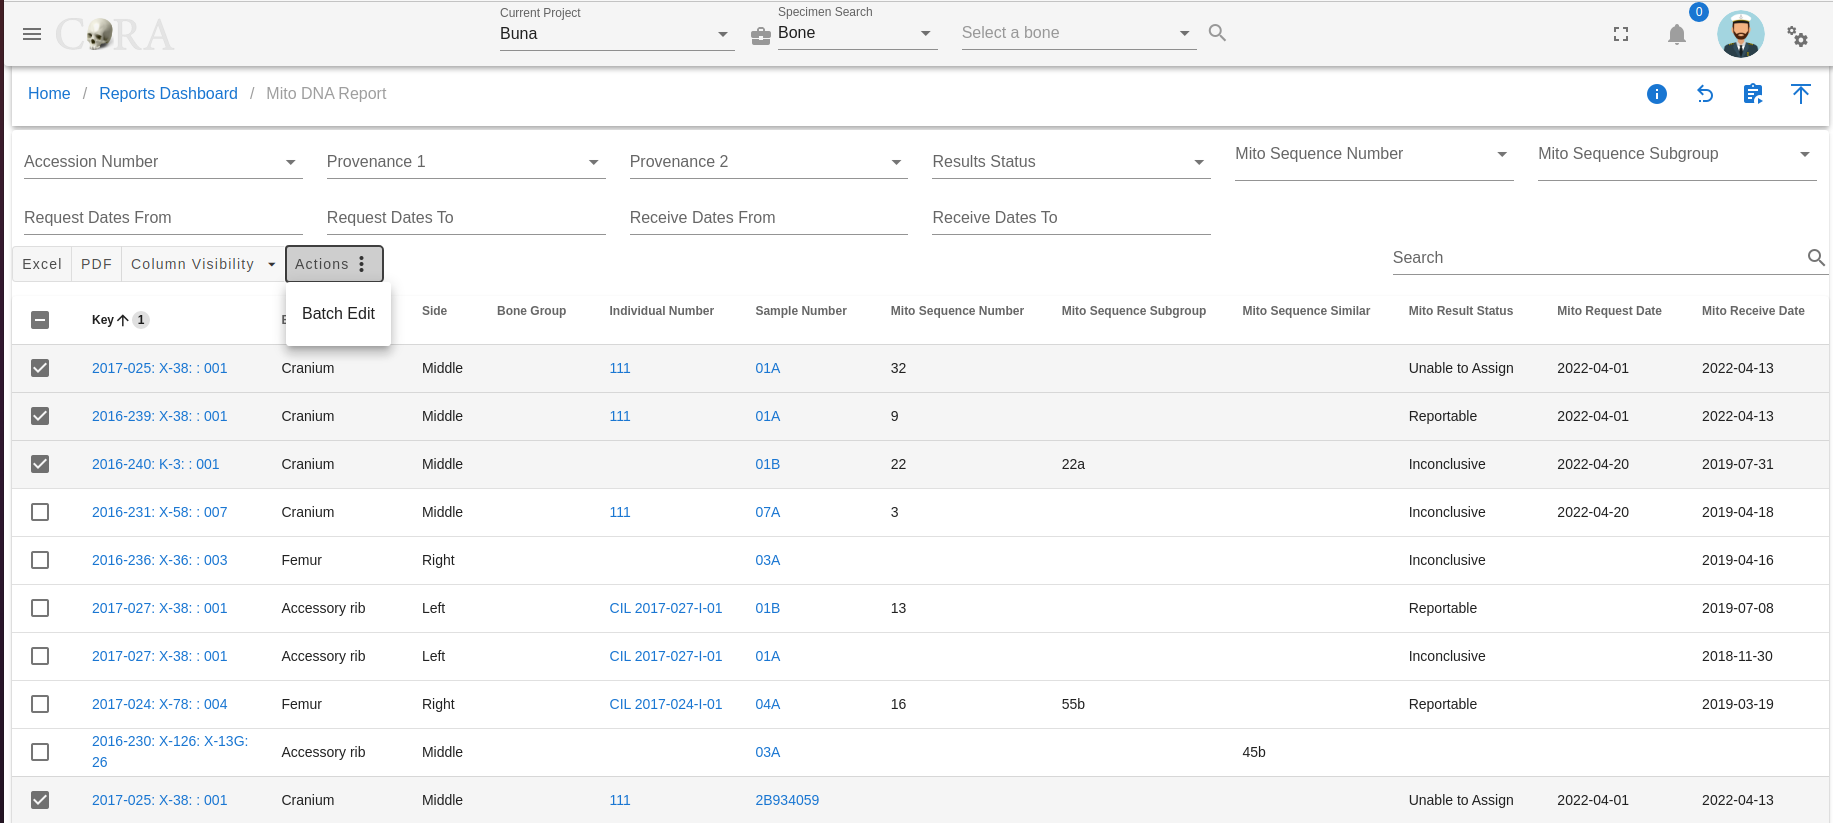
In the popup, select the changes you wish to make and then click on the save icon.
Created: 2023-12-22