Specimens or Skeletal Elements
Specimen are individual human remains which can be categorized. Many of the modules on the site are focused on specimens and their association details such as Biological Profile, DNA Profile, Measurements, Zones, Articulation, Pair Matching, Refits, Morphology, Pathology, Trauma, Taphonomy, etc. This section will explore navigating the specimens and their associations screen related characteristics.
- Specimen Navigation
- Creating a New Specimen
- Creating a New Specimen Group
- Specimen Search
- Specimen Details
Specimen Navigation
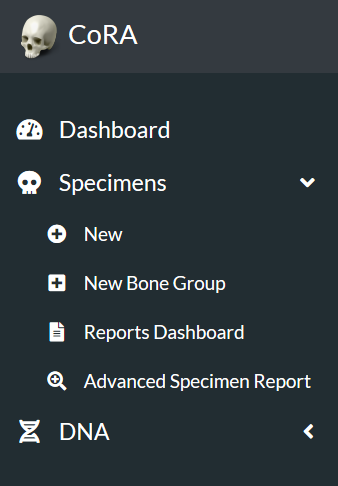
On the left side bar - you can access the main options for specimens. For Report Dashboard - please see the Reports documentation.
Creating Specimens
You can create a new specimen in multiple ways. For example you can create a a single specimen or multiple specimens belonging to a bone group such as Arm, Shoulder, Vertebral Column, Hand, Feet, etc. In the future we plan to include specimen creation via a Homunculus. I know I'm getting ahead of myself but that is on our dream list.
Single Specimen
To create a new specimen navigate to the Left Sidebar Menu -> Specimen -> New Specimen. You will be taken to the new specimen screen as shown below.

The screen fields are shown below. Fields in bold are required.
| Attributes | Data Type | Size | Validation Rule | Required/Optional |
|---|---|---|---|---|
| Accession | String | 32 chars | Can only contain letters, numbers, dash and space and should have min 3 chars | Required |
| Provenance1 | String | 32 chars | Can only contain letters, numbers, dash and space | Optional |
| Provenance2 | String | 32 chars | Can only contain letters, numbers, dash and space | Optional |
| Designator | Alphanumeric | 32 chars | Can only contain letters and numbers | Required |
| Bone | Id | id | valid bones via dropdown | Required |
| Side | String | 8 chars | valid sides via dropdown (Left, Right, Middle, Unsided) | Required |
| Completeness | String | 16 chars | valid completeness via dropdown (Complete, Incomplete) | Required |
Once these details are filled and the specimen is saved, a new specimen with an appropriate id is generated and the user is navigated to the below screen. The screen is in View state and the user can edit it by clicking on the edit icon.
- The toolbar shows the options to the Edit/Save button and the Expand/Collapse button.
- The Details button lists all specimen associations.

The screen fields are shown below. Fields in bold are required.
| Attributes | Data Type | Size | Validation Rule | Required/Optional |
|---|---|---|---|---|
| Accession | String | 32 chars | Can only contain letters, numbers, dash and space and should have min 3 chars | Required |
| Provenance1 | String | 32 chars | Can only contain letters, numbers, dash and space | Optional |
| Provenance2 | String | 32 chars | Can only contain letters, numbers, dash and space | Optional |
| Designator | Alphanumeric | 32 chars | Can only contain letters and numbers | Required |
| Bone | Id | id | valid bones via dropdown | Required |
| Side | String | 8 chars | valid sides via dropdown (Left, Right, Middle, Unsided) | Required |
| Completeness | String | 16 chars | valid completeness via dropdown (Complete, Incomplete) | Required |
| Measured | Boolean | true/false toggle | Optional | |
| DNA Sampled | Boolean | true/false toggle | Optional | |
| Isotope Sampled | Boolean | true/false toggle | Optional | |
| Inventory Completed | Boolean | true/false toggle | Optional | |
| Reviewed | Boolean | true/false toggle | Optional | |
| CT Scanned | Boolean | true/false toggle | Optional | |
| X-ray Scanned | Boolean | true/false toggle | Optional | |
| 3D Scanned | Boolean | true/false toggle | Optional | |
| Individual Number | String | 32 chars | can only contain letters, numbers, dash and space | Optional |
| Remain Status | String | 16 chars | valid sides via dropdown (In Lab, Released) | Optional |
Click "Save" When you are done making changes.
A specimen can be deleted by clicking on the delete icon and then confirming the deletion in the pop-up.

Multiple via Bone Group
To create a multiple specimens via bone group - navigate to the Left Sidebar Menu -> Specimen -> New via Bone Group. You will be taken to the new specimens via bone group screen. Here you can create multiple specimens that belong to the same bone group.
Tip
This is the preferred way to create multiple specimens within a bone group as CoRA will automatically create articulation relationship amongst them. You can also apply Pathology, Trauma and Taphonomy to these specimens at the time of creation simplifying and speeding up the data entry process.
The fields to create a new bone group are:
- Bone Group
- Grouping
- Bones
- Side (defaulted to 'Left')
- Completeness (defaulted to 'Complete')
- Accession
- Accession
- Provenance 1
- Provenance 2
- Starting Designator
- Pathology
- Trauma
- Pathology
- Taphonomy
The bolded fields are required. Once you have created a new bone group, you can edit the fields and click "Save" to update the bone group.
| Attributes | Data Type | Size | Validation Rule | Required/Optional |
|---|---|---|---|---|
| Bone Group | String | 64 chars | can only contain letters | Required |
| Bone Group Id | String | 64 chars | valid UUID, auto generated | Required |
| Side | String | 8 chars | valid sides via dropdown (Left, Right, Middle, Unsided) | Required |
| Completeness | String | 16 chars | valid completeness via dropdown (Complete, Incomplete) | Required |
| Accession | String | 32 chars | can only contain letters, numbers, dash and space and should have min 3 chars | Required |
| Provenance1 | String | 32 chars | can only contain letters, numbers, dash and space | Optional |
| Provenance2 | String | 32 chars | can only contain letters, numbers, dash and space | Optional |
| Starting Designator | Alphanumeric | 32 chars | can only contain letters and numbers | Required |
| Bone | Id | id | valid bones via dropdown | Required |
Once you have created a new bone group, you can edit the fields and click "Save" to update the bone group.
Tip
When creating specimens via bone groups, you only have to specify the starting designator and CoRA will automatically create the specimens with that starting designator and increment it for subsequent specimens within the bone group.
Multiple via Homunculus
To create a multiple specimens via homunculus - click the "New via homunculus" link on the Specimens left navigation bar. You will be taken to the new specimens via homunculus screen.
Warning
This is an experimental feature and is work in progress. We will keep you posted when this feature is available.
Specimen Actions or Details
The screenshot below shows the Actions or Details menu for the selected specimen. Here you can enter association data for the specimen. Each of the Action or Details menu option is explained in the following section.

Biological Profile
The Biological Profile is where you can record the various methods and method features for method type Age, Ancestry, Sex, and Stature. CoRA's intellisense engine will automatically provide you the available methods for each method type which are currently registered in CoRA. The user can add, edit or delete a method.
Age
Sex
Ancestry
Stature
Warning
This section needs to be documented
DNA Profile
The DNA Profile screen displays the following elements about a bone:
- DNA Sample Number
- Lab
- External Case #
- BTB Request Date
- BTB Results Date
- Disposition
- Sample Condition
- Weight Sample Remaining
On this screen, you can also view the "Mito", "auSTR", and "Y-STR" forms and navigate by clicking the form name or by clicking the Next button.
Isotope Analysis
The 'Create Isotope' section allows to create a isotope for the given bone. This section has the following elements. - Lab - External Case # - Isotope Sample Number
After you create the Isotope, you will receive the "success" message. By selecting the sample number, the Isotope screen pops up. Click on the Edit button to edit the information under each section.CLick on the Save button under each section saves the information and navigates the user to the next section of information. All the updated information can be saved at once by clicking on the ‘Save All’ button.
Taphonomy
The Taphonomies section allows you to view Taphonomies for the given bone. To add Taphonomy, click the pencil icon to edit and select Taphonomies. Click the Save icon to save the changes.
Zonal Classification
The Zones pane displays various zones of the bone. For example below are the following zones about the bone Radius:
- Lateral half of radial head
- Medial half of radial head
- Lateral portion of distal articulation
- Medial portion of distal articulation
- Proximal diaphysis
- Lateral half of diaphysis
- Medial half of diaphysis
- Superior half of distal third
- Lateral distal third
- Medial distal third
- Styloid process
These fields are read only - to edit then click the pencil icon. Multiple zones can be selected. All the listed Zones can be selected or deselected by clicking the ‘Select all’ check box. Click the save icon to save the changes.

Measurements
The measurements pane displays various measurements of the given bone. The following are the measurements for a given bone Radius: - Rad_01 Maximum Length - Rad_02 Maximum Diameter of the Radius at Midshaft - Rad_03 Minimum Diameter of the Radius at Midshaft - Rad_04 Maximum Diameter of the Head - Rad_05 Anterior-Posterior (Sagittal) Diameter at Midshaft - Rad_06 Medial-Lateral (Transverse) Diameter at Midshaft - Rad_07 Maximum Diameter at the Radial Tuberosity - Rad_08 Maximum Diameter of the Diaphysis Distal to the Radial Tuberosity - Rad_09 Minimum Diameter of the Diaphysis Distal to the Radial Tuberosity - Rad_10 Breadth of the Distal Epiphysis
These fields are read only - to edit, click the pencil icon. the minimum value, threshold limit and maximum limit are indicated to the user through the alerts. Click the save icon to save the changes or ‘Undo’ icon to undo all the changes made. The blue badge on top of the bone name indicates the number of measurements filled out of the total number of available measurements for that particular bone. The pane can be expanded or collapsed by clicking on the arrow icon.
Association
There are four types of associations. Process of adding each association is shown below. After the association is added, refresh the page to see the Details button updated. The details button opens a data table of all available associations under that specimen.
Pair Matching
Refits

Articulations
Morphology
Pathology, Anomaly & Trauma
Pathology, Trauma and Anomaly can be accessed on one screen as different tabs. The user can create a new item by clicking on the create button.
Pathology
Anomaly
Trauma
Specimen Review
The review tab is a pane which displays all other sub reports in one area. All reports are editable in the pane. For information on individual reports - see their detailed documentation.

Specimen Bulk Edit
Several specimen fields can be bulk-edited. To bulk edit, select multiple specimens by clicking in the boxes next to the specimens you want to edit, click on the Actions tab, and then select Batch Edit.

In the popup, select the changes you wish to make. When you mark a specimen as scanned, completed, or reviewed, the date for the change is auto-filled to the current date.

If the remains are marked as in the lab, there is no corresponding date.

If the remains are marked as released, there is a date field.

Specimen Search
The easiest way to search for specimens is to use the top search bar in the header. To find out more visit the search documentation
Created: 2023-12-22